This article deals with the specific situation where all your members have group subscriptions. For any other organisation set-up, please read this article on how to merge accounts.
2 Members Accounts
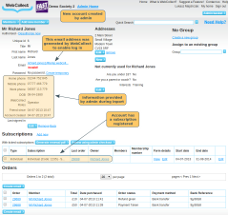
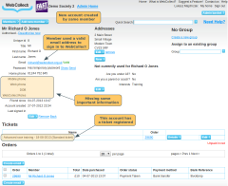
In an ideal world it wouldn't happen. However, it is possible to end up with 2 duplicate accounts for the same member. The most common reason this happens is when you import your member data and don't know the member's email address when you import. Instead of signing in with the temporary WebCollect email address they have been allocated, they create a new account with their real email address. Or perhaps they have multiple email addresses, and forget they already have an account...
Which one to keep
If one account has a temporary email address, and the other is a real one, then the choice is easy (keep the real one!). If both accounts have real email addresses, then you may need to ask the member which one they want to use.
Cleaning up the one you don't want
Open up both of the member's pages in the admin panel. It is simplest if you use tabs in your browser, and have one open in each tab, so you can flick between the 2. Compare what information you have for the member on each page, to decide what you can/should transfer across.
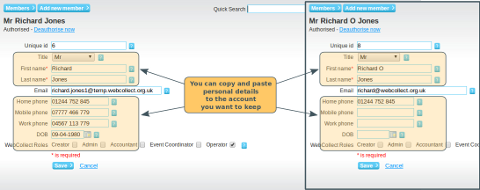
Member details (name, addresses, phone numbers, DOB)
This is a copy/paste job. If the member has logged into the account you want to keep, you will no longer be able to change their details. This is because, once they have logged in and taken control of their account, we treat it as theirs. If they have logged in, the chances are they have completed all of their details (they are required to fill in the majority of them duing checkout). If there are any details missing, you will need to email them and ask them to update their account.
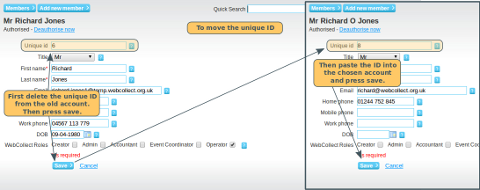
Unique Id (membership number)
This is for organisations who use the WebCollect Unique Id field to store membership numbers for their members. As the name suggests, the field is unique, ie 2 members can't use the same number. So if this needs transferring, you will need to edit the member account you are getting rid of (click on edit under the member's personal details), change the number to something else, or delete it. Then you can add it to the other account.
Membership Form
This is another copy/paste job. Click on edit under the membership form on the account you want to keep, and copy across the relevant information.
Subscriptions
Step 1: Check that the member account which you are transferring the subscription to is in a group.
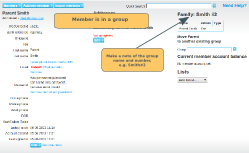
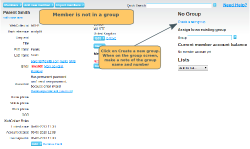
You can do this by going to their member page in the admin panel. Have a look at the top right of the page. If they are in a group, you will see the group name and number, e.g. Smith#2. Make a note of this. If they are not in a group, click on Create a new group. This will take you to the group screen. Make a note of their group name and number.
Step 2: Transfer the group subscription.
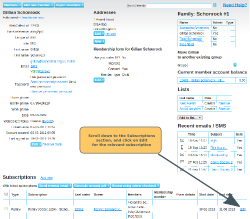
Go to the member account which you are transferring the subscription from. Scroll down to the subscriptions section. Click on Edit for the relevant subscription. On the Subscription detail screen, start typing the name of the group that you are moving the subscription to (the one you made a note of in Step 1). Select it from the dropdown. This will move the subscription
Orders
You can change the purchaser of an order to someone else in the same group as the original purchaser.
Step 1: Put both of the accounts in the same group.
Note: You must transfer the group subscription before you start this process. See above for details.
Go to the member page for one of the accounts (it doesn't matter which one). On the right hand side, start typing the name of the group that the other account is in, and select it from the dropdown.
Step 2: Transfer the orders
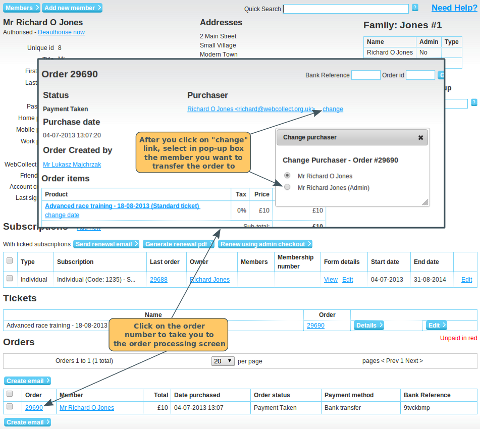
On the member's screen for the member account you want to get rid of, scroll down to the Orders section and click on the order number to take you to the order processing screen. Click on the word "change" next to the purchaser (top of screen). You will see a pop-up box appear with a list of all members in their group.
Tickets
These move with the order. See above on how to transfer orders.
Deleting the member you don't want
Once you have transferred all of their information across to the account you want to keep, you can remove the member you don't want.
You must remove them from the group first. Click on the group name top right. Then on the family screen, click on Remove next to the member's name.
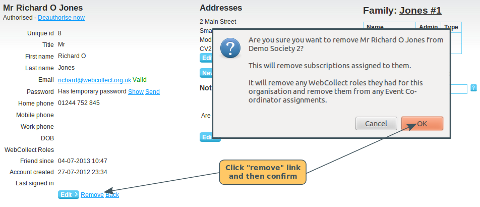
Then, to remove the member, go to their member screen in the admin panel. The "remove" link is under the section with their personal details.
Removing a member removes them from your organisation. If they have never logged in, and are not members of any other organisation in WebCollect, then their account will automatically be deleted within a few minutes after you remove them. If they have logged in, but have asked to have their account deleted from the WebCollect database, please contact us with details of the account (email address and member details).
