Event Date
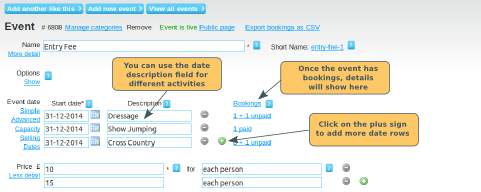
The event date section has a number of different views. To see each view, click on the links on the left.
Simple View
In the simple view, you can add a date and a description. Date is required (so the system knows where to slot it in the calendar).
Date - To add a date, click on the calendar icon, or you can type the date in this format: dd-mm-yyyy.
If the event has sessions running on multiple dates, click on the plus sign (minus sign to remove them). You can also add a date to add a second activity within the event. Click here for details on configuring multi-date events and here for multi-activity events.
Description - add any specific information relating to that date (e.g. starting earlier at 10am). If you are using the date fields for different activities, put details of the activity here.
Bookings - once the event is live, and members have started booking on the event, you can see how many bookings have been made, and whether they have been paid or not.
Advanced View
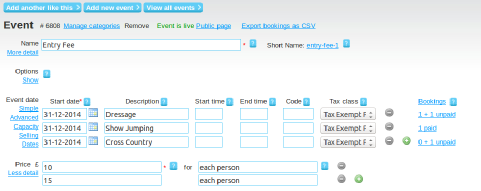
Clicking on the Advanced link gives you the following additional options:
Start Time - Use the format 14:00 or 2pm. Event dates that have a start time configured, will be displayed in your calendar, or list of upcoming events in start time order. Any event dates with no start time configured will be displayed first.
End Time - Use the format 14:00 or 2pm.
Code - if you use an accounting code or reference system for your events, insert details here.
Tax Class - The default tax class that will show will be the one that you have configured for the organisation. If the tax class needs to be different for this event, you can change the tax class here. Select the appropriate tax rate from the dropdown list. Note: The price that you should put in the ticket price box should be the tax inclusive amount (ie what you want the purchaser to pay).
Capacity
Clicking on the "Capacity" link gives you the following additional options:
Capacity - if there are a maximum number of people who can attend this event, insert the number here. Otherwise leave blank. The number in the balance column will show you how many tickets have NOT yet been sold. If you change the capacity after you have started selling tickets, the balance will automatically be updated.
Balance - this is the number shown in this column is the number of tickets remaining (i.e. have NOT yet been sold). If you change the capacity after you start selling tickets, the balance will automatically be updated.
Selling Dates
Clicking on the "Selling Dates" link gives you the following additional options:
Sell from - if you insert a date here, members will not be able to purchase tickets until the date specified. The event page will display the date, so members can see when they should come back to purchase.
Sell to - if you insert a date here, members will no longer be able to purchase after the end of the date you specify. The event will continue to be displayed, but will state that event is closed for bookings. Note: If you want members to be able to purchase tickets after the event has taken place, put a Sell to date in that is after the date of the event.
Event Dates and Forms
If you are configuring an event with multiple date rows, and you have configured an event form, click here for details on the form filling options (one form for all tickets, or one form per ticket purchased).


